Why would you want to permanently disable a touch screen? It became a need for me when the touchscreen on my Dell laptop became defective, continually receiving faulty signals or touches on the screen without touching it.
The problem is when you try to log in, the faulty touches on the screen, sometimes called ghost touches, continually take focus away from the password box. If I managed to touch in the password again, anything I had typed already was selected so typing again would replace what I had already typed in.
For example, if my password was ‘password’ (not recommended to use for your password), I would type manage to type in ‘pass’ then the faulty touch would loss focus from the password. I click back in using the mouse and ‘pass’ would be selected so when I type in ‘word’ it replaces what I already typed in.
Disabling the touch screen in Windows 10 stops this problem but you first have to log in and disable the touchscreen from Device Manager. I managed to do this by once getting lucky enough to have time to enter the full password and another time by using an external monitor and switching screen modes to use only the external monitor.
Once the touchscreen has been disabled, no more problem, right? Yes, there was no more problems trying to login with the touchscreen disabled… until Windows Update installed a major update and reset the touchscreen back to the default setting of being enabled again. Hence why I have had to try fixing this more than once.
There is no setting in Device Manager to keep the touchscreen permanently disabled. Luckily, there is a solution that remains in place after a major Windows 10 update.
You will need to use the Registry Editor. For those who are not familiar with it (and to many who are familiar too), the Registry Editor can be a dangerous tool. If you edit the wrong thing you could cause your computer to stop working. If you don’t know exactly what each thing in it is for, don’t touch it and follow the these instructions exactly.
You will need to run the Registry Editor as Administrator because it makes changes to how Windows operates.
Steps to Permanently Disable Touchscreen
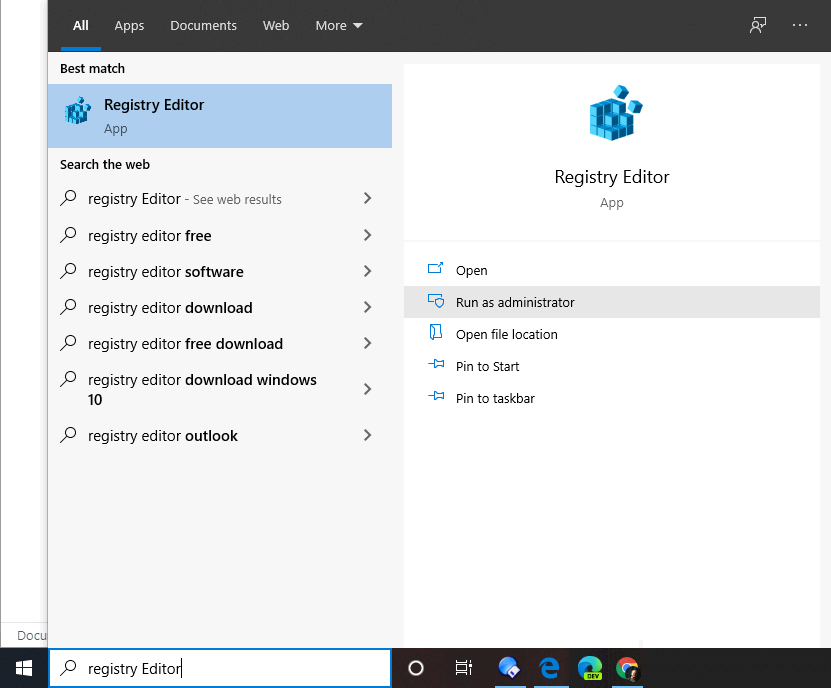
1. Open Registry Editor
Click on Windows Start and type ‘Registry Editor’. The Registry Editor app will display. Click on the ‘Run as administrator’ option.
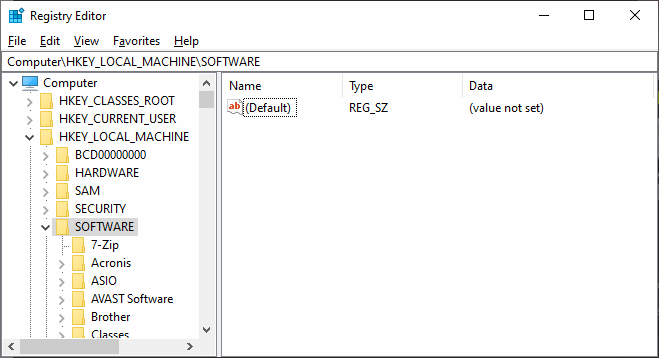
2. Expand Registry Folder
Expand (open) the registry folders under HKEY_LOCAL_MACHINE, then SOFTWARE, Microsoft, Wisp, and Touch.
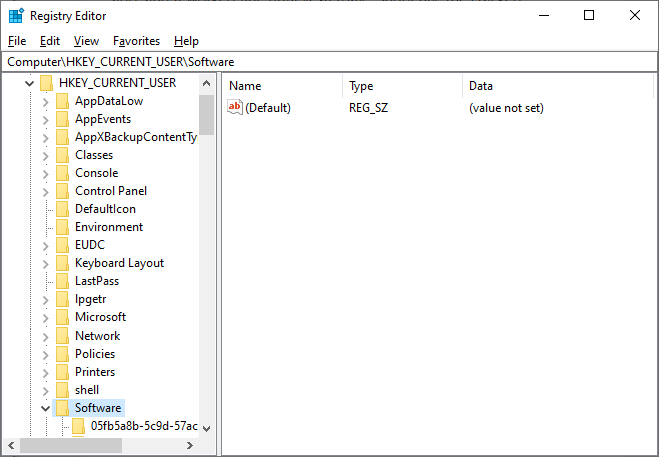
The screenshot below shows Registry Editor expanded to the HKEY_LOCAL_MACHINE\SOFTWARE folder:
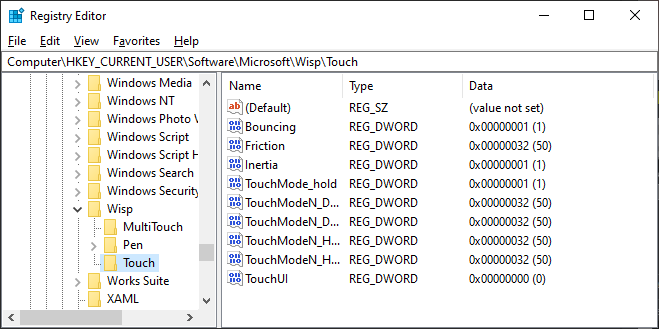
Continue opening the folders until you are in the Wisp folder as below:
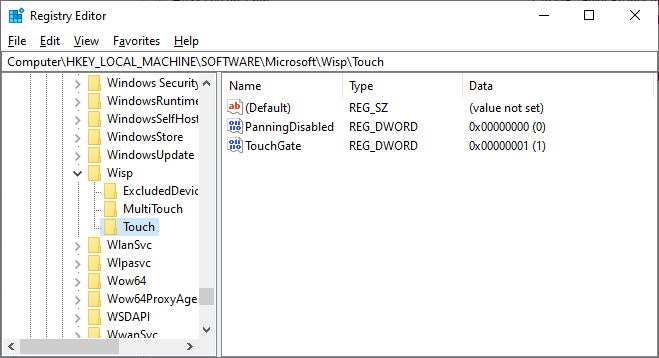
3. Edit TouchGate value
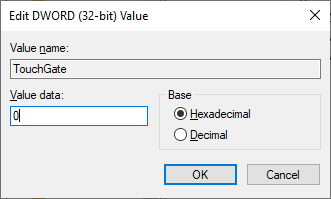
There should be a name under Touch called ‘TouchGate’. Do permanently disable the touchscreen, we need to change the value in the Data column to 0, shown as ‘0x00000000 (0)’, instead of ‘0x00000001 (1)’.
If the TouchGate value is not there, right-click in the white space and select ‘New > DWORD (32-bit) Value’ in the popup menu and change the new value name to ‘TouchGate’.
Double-click TouchGate, and change the Value data from 1 to 0, as shown below:
When the computer reboots, the touchscreen will be disabled.
Steps to Permanently Disable Touchscreen Only for the Current User
You may want to disable the touchscreen only for certain users. Naturally, this would be for a different reason than a faulty touchscreen where you would want it disabled for everyone. For example, you may want to disable the touchscreen for a child or for a public display that you don’t want the touch screen activated for.
1. Open Registry Editor
Open Registry Editor the same way as described above.
You need to be logged in as the user you want to disable the touch screen for. The steps are similar, except where the top folder in Registry Editor is KEY_LOCAL_MACHINE, the top folder is HKEY_CURRENT_USER.
2. Expand the Registry folder
The rest of the folder is the same, expand (open) the registry folders Software, Microsoft, Wisp, and Touch.
3. Create TouchGate value
The TouchGate value is not normally included so you will need to create it. Right-click in the white space on the right side and select ‘New > DWORD (32-bit) Value’ in the popup menu and change the new value name to ‘TouchGate’.
Double-click TouchGate, and change the Value data from 1 to 0, as shown below:
The touchscreen will now be disabled for the current logged in user when they log in again.